Boho Festival Crochet Hoodie
Unisex crochet hoodie pattern
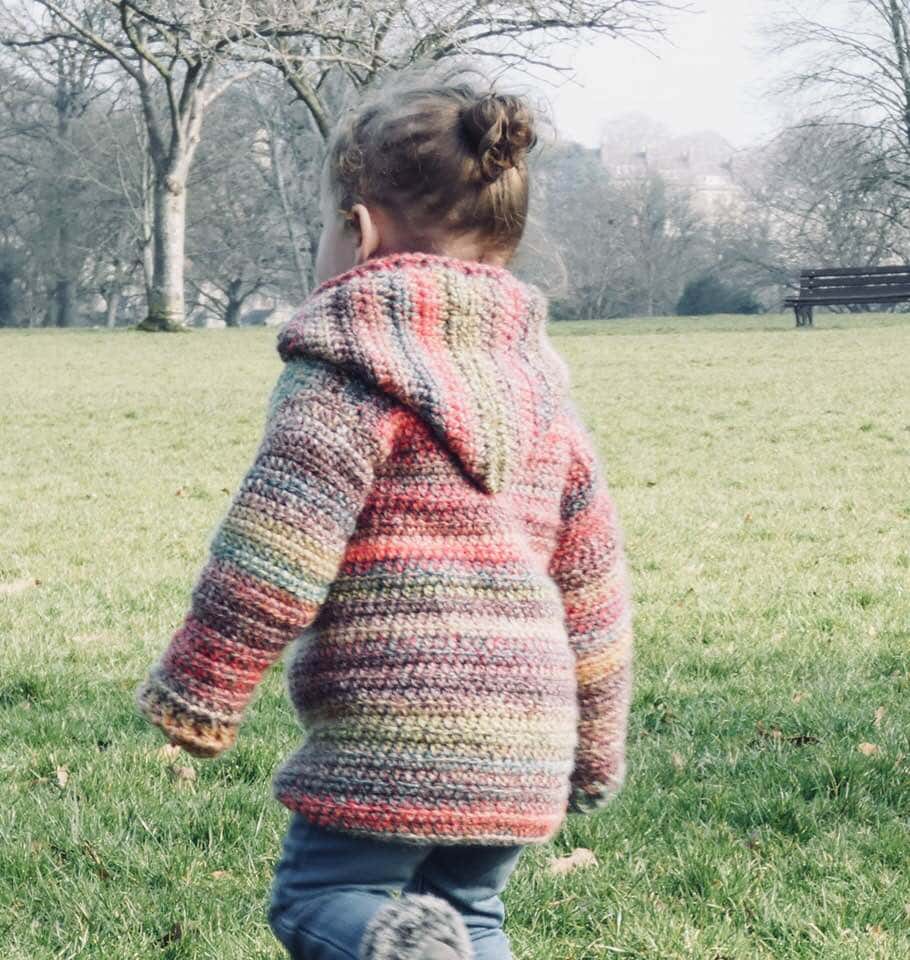
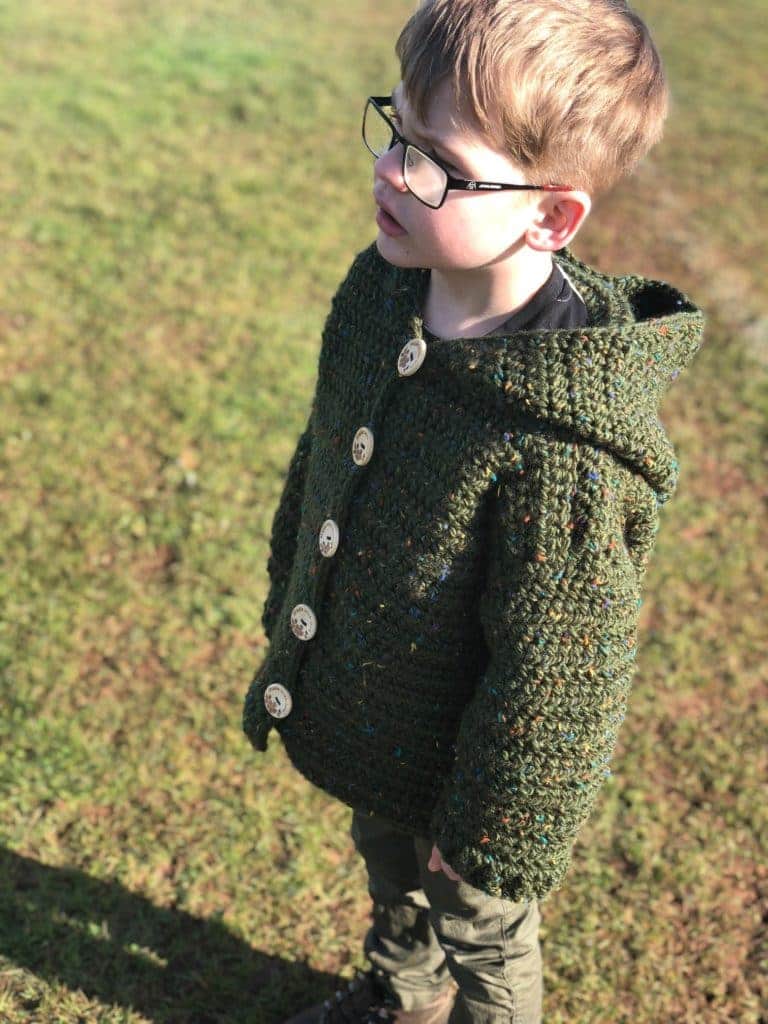
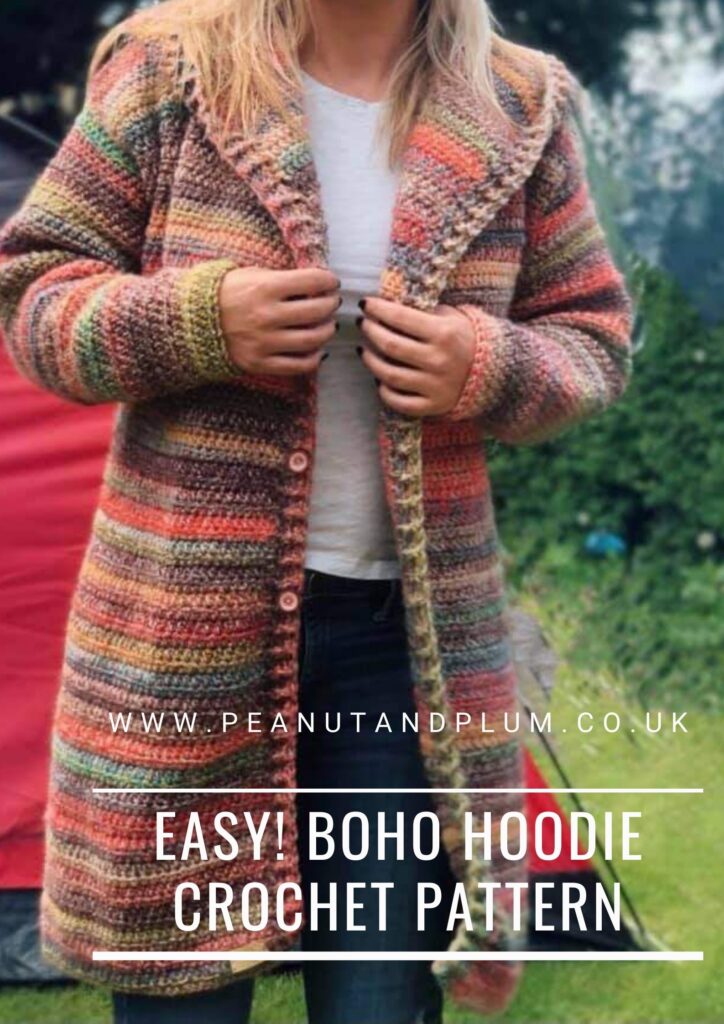
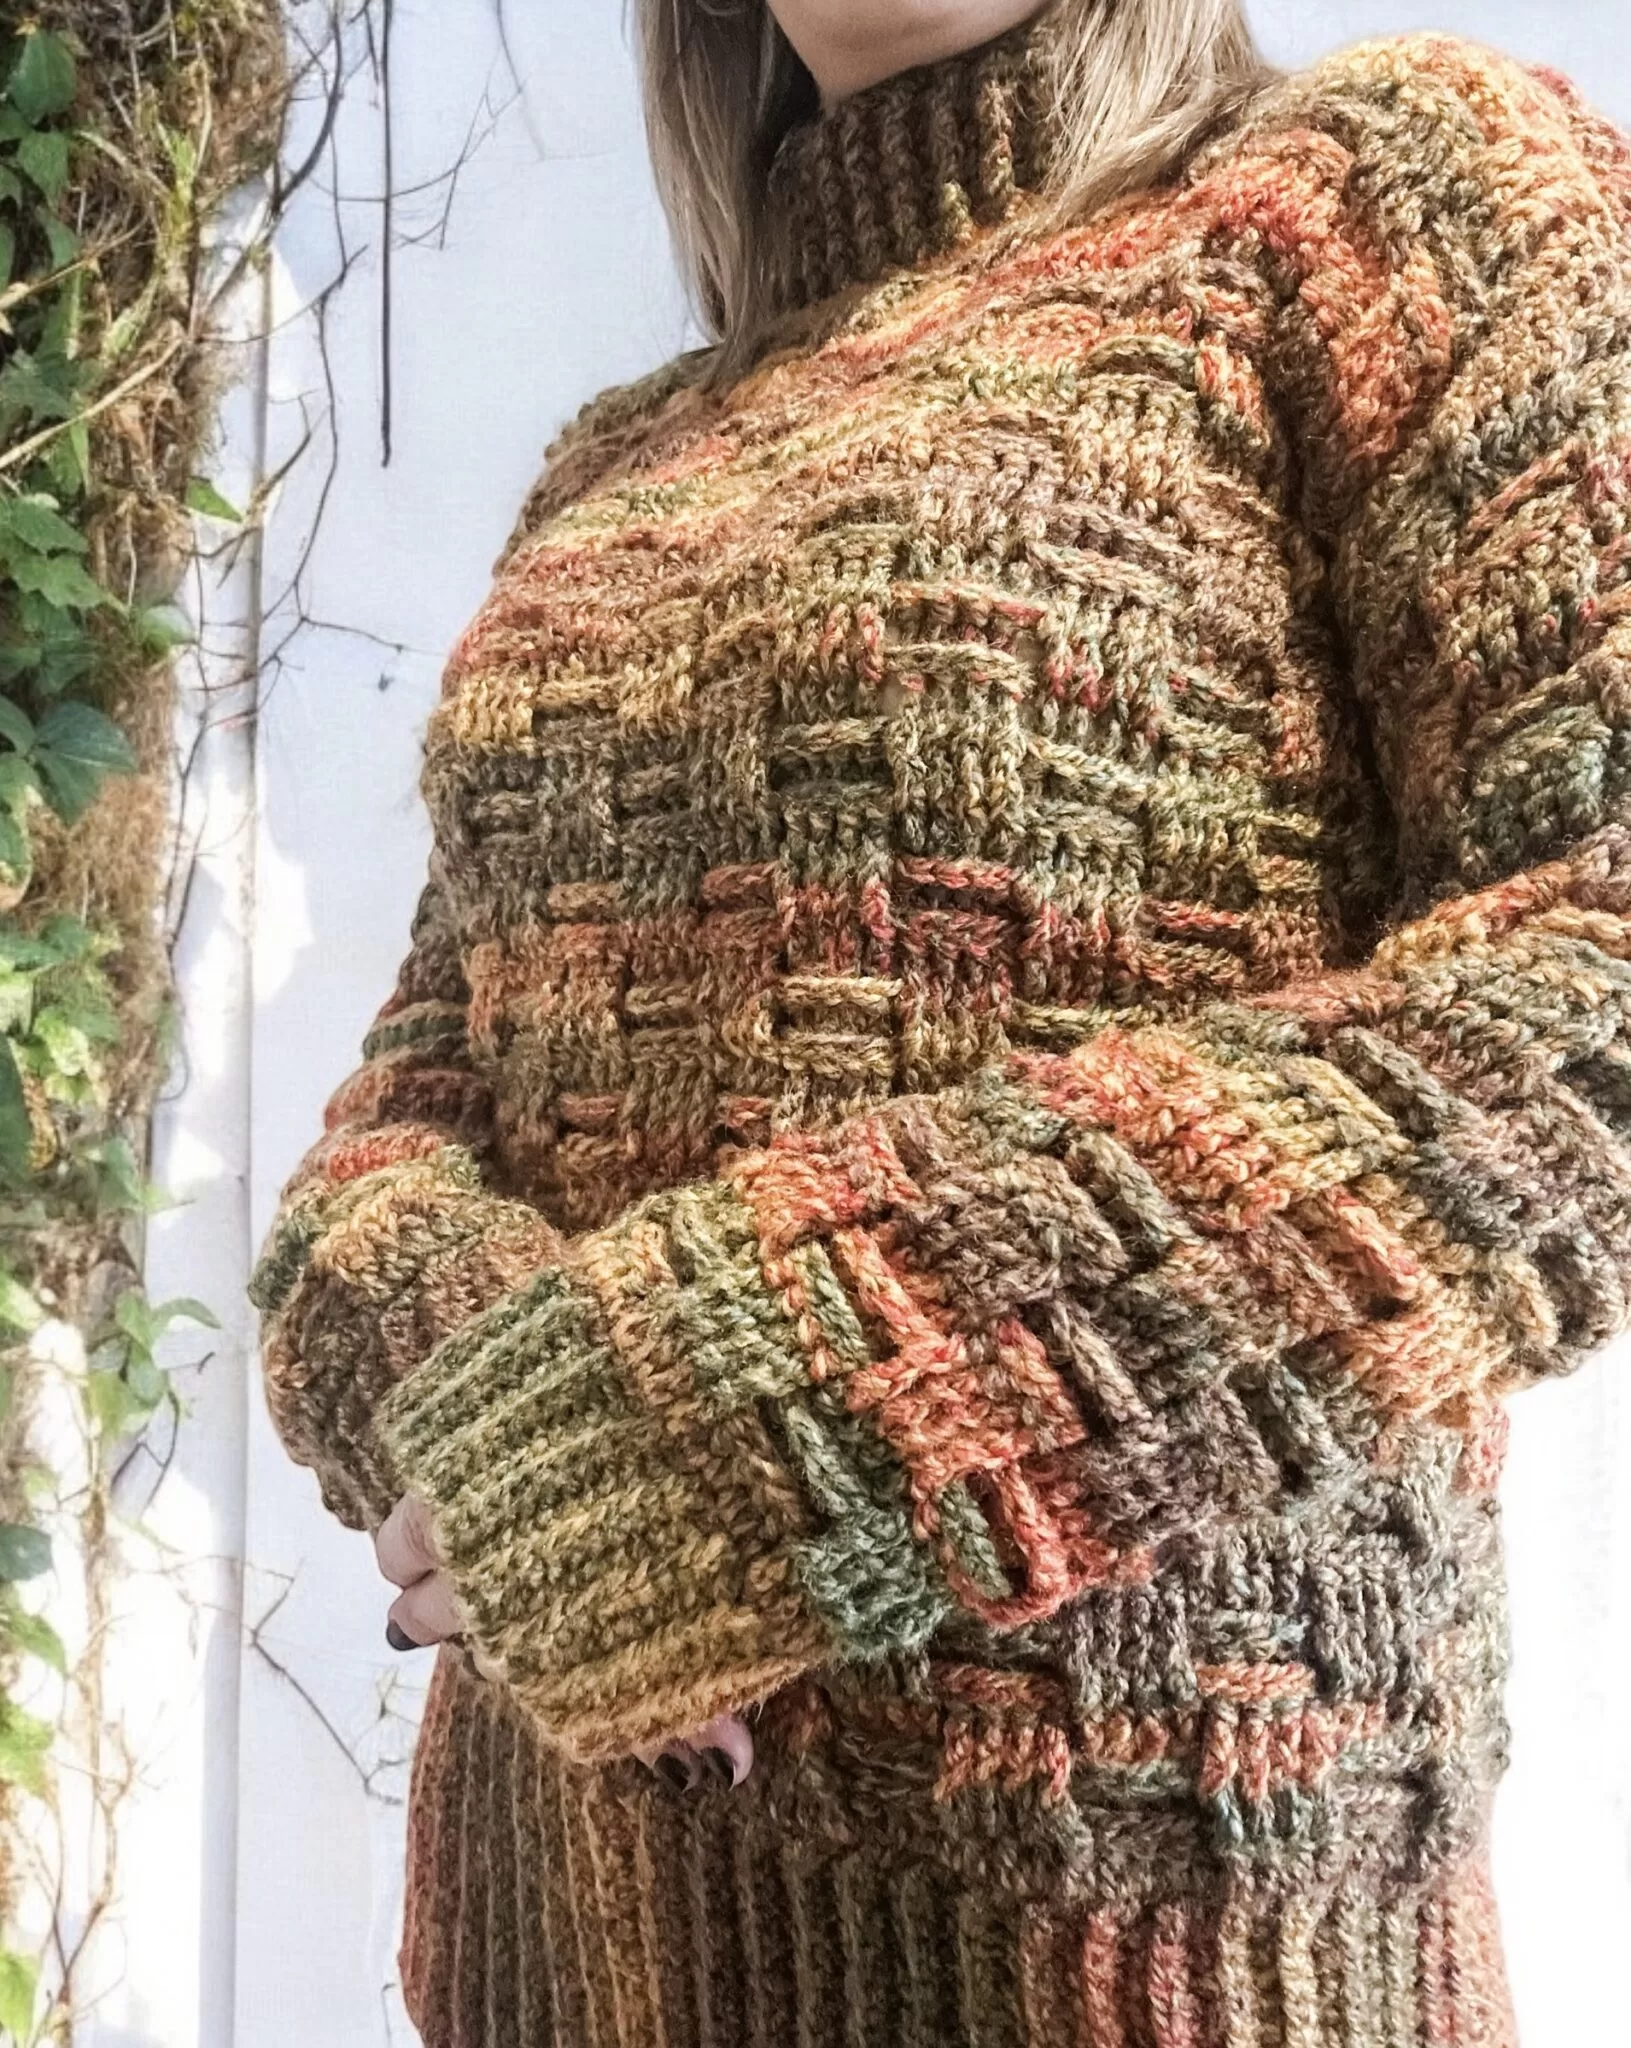
A stylish and warm unisex crochet Bohemian hooded jacket with beautiful, earthy tones and super-soft texture.
***This pattern has been revised and is available here in sizes 12months – Adult XXXLarge.
Boho Festival Hoodie
Pattern is written in US terms.
A stylish and warm Bohemian hooded jacket in sizes 12months – Adult XXXLarge.
Crochet along video tutorial available!
Made from bottom to top, adding the sleeves, hood and ribbed edging.
In stock
Boho Festival Hoodie 12months – Adult XXXLarge video tutorial Follow along to my “crochet along” video tutorial***
Continue reading for the previous Boho festival jacket pattern…
Perfect for those chilly walks, days out or evenings around the campfire.
This pattern is unisex and looks great in stripes, block, yarn cakes and marble colours.
The jacket features rimmed edging, rimmed cuff and hood.
I have created a video to help you with stitches and construction of jacket. Watch it below 🙂
Pattern in size 12 months below
I have been experimenting with yarn cakes recently, the way you can have a beautiful colour changing flow without having to change yarns every row appeals to the Sunday crocheter in me. While I was hunting for the perfect colour mix, I stumble across this yarn –
The Bohemian Festival Hoodie is born
It was the perfect find for the jacket I had been envisioning for my little plum to wear to all the children’s Festivals we have planned this year.
available in 200g balls and a range of tones but best of all it is sooo cost-effective. The yardage per ball for a chunky yarn is phenomenal for the price. It worked up super quick and has a soft, close stitch that has a knit quality and beautiful stitch definition.
I try to make my patterns as easy to follow as possible, thinking of all the beginners out there eager to get their teeth into a project who may get over whelmed with technical patterns (I have been there) and stitch overload.
Bernat has some great patterns and they have introduced me to a new way of pattern design, by making clothing in flat square pieces and stitching them together, this brings out the Crocheter/seamstress in me.
It makes following a pattern so much easier, You might even find yourself working on your own pattern after you master this tecnique.
No more getting half way through your project then finding something has gone a bit sideways you wont get lost with this pattern.
I am going to share with you a free version today in size 12m 🙂
You can purchase a full PDF printable version in sizes 12m – 12years here Boho Festival Hoodie – 12m -12years
Pattern uses worsted weight yarn (size 4)/ chunky and 6mm/J Hook
Buttons x 4 20mm for 12m
Pattern is written in US terms.
I have used colour MC45 you can purchase it at a very affordable price here
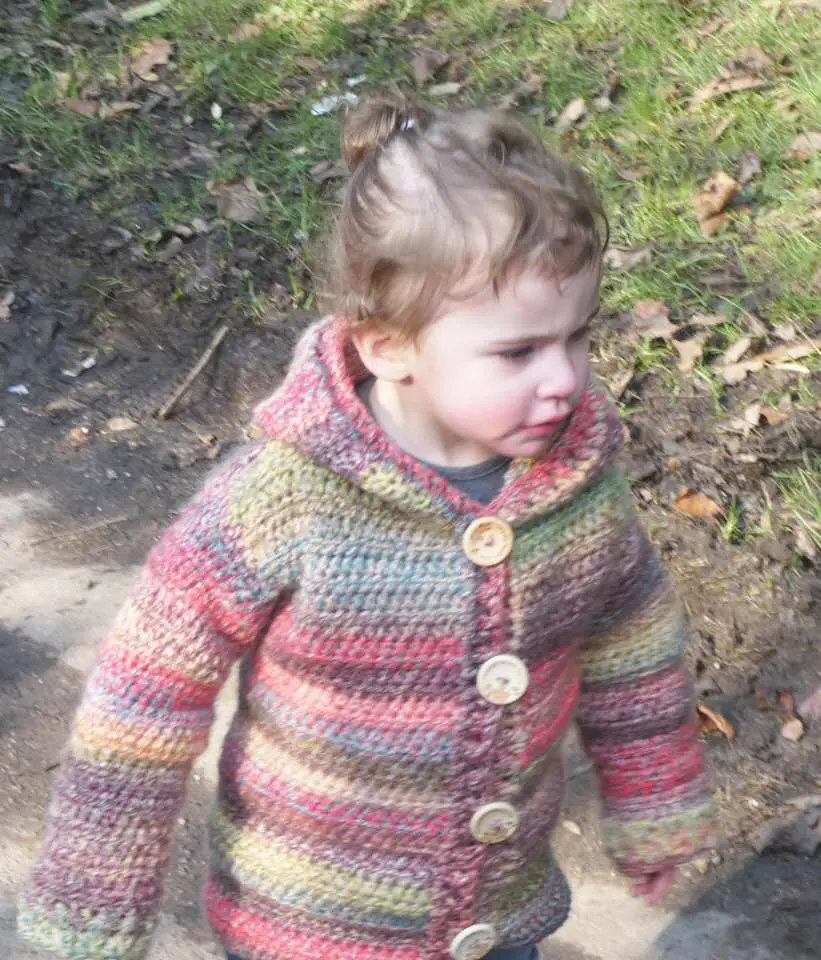
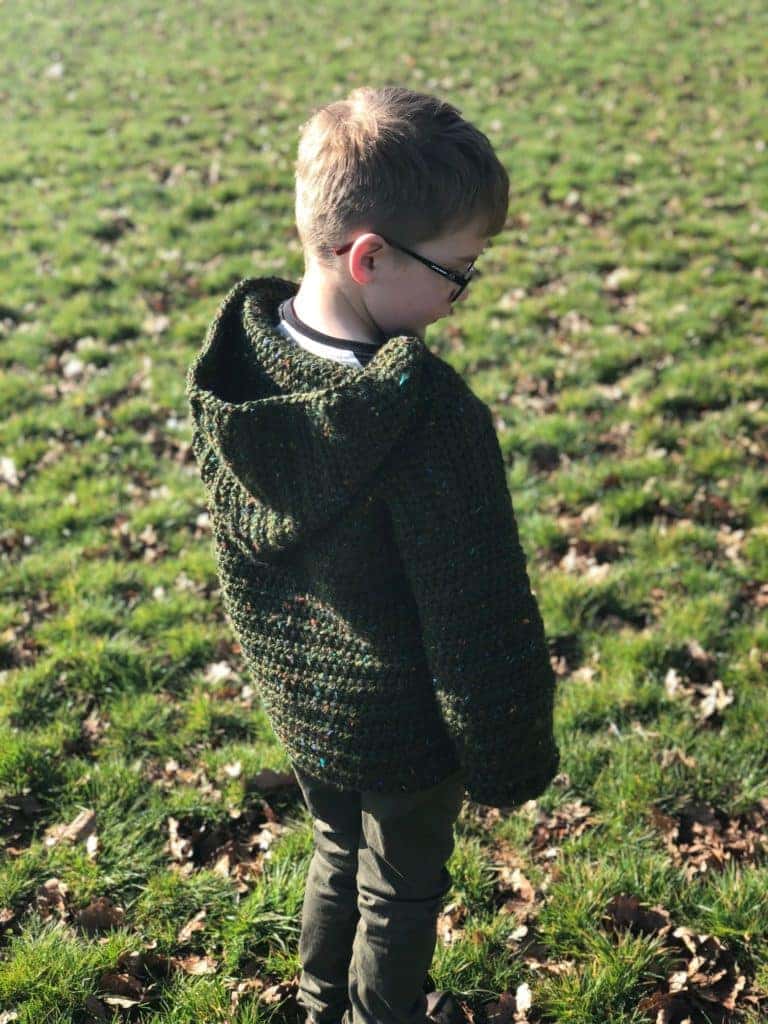

The earthy tones have a real Eco/Bohemian feel to it and is exactly the look I was going for.
We were out at the park and Alice was sporting her new jacket, I was asked by 3 people where I had bought it – proud Mummy moment!
Free pattern for Boho Festival Hoodie – Size 12 months
| Gauge for all sizes is 10hdc x 10 rows = 4” square (APPROX)
Stitches: Hdc – Half double crochet Fpdc – front post double crochet Bpdc – back post double crochet
The circumference of the 12 Month hoodie is approximately 21” from the widest point. Approx. 400 yards/370 meters needed. I have used James C, Brett Marble chunky. This pattern is made with 3 rectangle pieces – Front lapel, left lapel, and back piece. We will then stitch these together and add the sleeves, hood and edging. Beginning with lapels (front sides) make x2. |
|
If you would like to see a tutorial for the stitches used in this pattern, here are some videos for the hdc2tog, fphdc and bphdc
Row 1:
Chain 16, Hdc in second chain and all across (15hdc)
Row 2- 34: Chain 1, Hdc across (15 Hdc)
Row 35: Chain 1, Hdc across, 2xHdc in last stitch (16Hdc)
Row 36: Chain 1, 2xHdc in first stitch, hdc across (17Hdc)
Row 37: Chain 1, Hdc across, 2xHdc in last stitch (18Hdc)
Fasten off, leave long tail approx. 2x length of piece for sewing seam.
Make x2 the same and then begin on Centre/back.
Centre/Back:
Row 1: Chain 29, Hdc in second chain from hook and across (28Hdc)
Row 2 – 37: Chain 1, Hdc across (28Hdc)
Fasten off, leave long tail approx. 2x length of piece for sewing seam.
Now we will sew the sides to the center back.
Place your side pieces right side face down to right side of center/back.
Sew from the bottom up 24 stitches on each side – leaving 12 stitches un sewn on each side (This will be the arm holes once we sew shoulders).
Sewing shoulders
Starting on the outer edge, sew in 9 stitches leaving 9 stitches un sewn. Do this from both outer edges on shoulders.
This will leave 28 stitches along the neckline from shoulder for us to add hood later.
Sleeves:
Attach yarn at bottom of armhole.
Row 1: Ch-1, hdc 28 times evenly around armhole (28)
Do not join, work front to back in a flat piece, we will seam at the end.
Row 2: Hdc across (28)
Row 3: Hdc in each stitch across, hdc2tog in last 2 sts (27)
Row 4-5: Hdc in each stitch across (27)
Row 6: Hdc in each st across, hdc2tog in last 2 sts (26)
Row 7-9: Hdc in each st across (26)
Row 10: Hdc in each st across, hdc2tog in last 2 sts (25)
Row 11: Hdc in each st across (25)
Row 12: Hdc in each st across, hdc2tog in last 2 sts (24)
Row 13: Hdc in each st across (24)
Row 14: Hdc in each st across, hdc2tog in last 2 sts (23)
Rows 15 – 18: * fphdc in first, bphdc in next * repeat between * * across. (23)
Fasten off and leave a long tail. Fold arm piece together (Right side to right side) and stitch to seam.
Repeat these steps for opposite sleeve.
HOOD:
Attach yarn at what will be the right lapel.
Row 1: Ch-1, hdc in next 9 sts, Hdc2tog (in the same 2 sts as shoulder seam) hdc in next 10 sts, hdc2tog (in the same 2 sts as shoulder seam) Hdc in next 9 sts (30)
Rows 2 – 5: Ch-1, Hdc in each st to end. (30)
Row 6: Ch-1, Hdc in first 9 sts, 2Hdc in next, Hdc in next 10 sts, 2Hdc in next, Hdc in next 9 sts. (32)
Row 7: Ch-1, Hdc in first 10 sts, 2Hdc in next, Hdc in next 10 sts, 2Hdc in next, Hdc in next 10 sts. (34)
Row 8: Ch-1, Hdc in first 11 sts, 2Hdc in next, Hdc in next 10 sts, 2Hdc in next, Hdc in next 11 sts. (36)
Row 9 – 20: Ch-1, Hdc in each st to end. (36)
Mark center two sts with stitch marker (move them up each row).
Rows 21 – 24: Ch-1, Hdc to marker, Hdc2tog, Hdc to end.
Fasten off and leave a tail for sewing hood together.
Sew hood ends together right side to right side.
Turn right side out.
Edging:
Attach yarn at bottom right corner.
Row 1: Ch-1, hdc in the end of each row up to hood, around the top edge and down the other side. Keep your stitches even just one for each row,
Row 2: Ch-1, * fphdc in next, bphdc in next * repeat between ** around to end.
Rows 3: Ch-1, fphdc around previous row’s fphdc (to create ribbing), bphdc around next bphdc. * fphdc around next, fphdc around next * repeat between * * Where you would like to position button holes, skip a front or back post hdc and chain 2. Repeat for as many buttons as you would like to place and continue with fphdc/bphdc to end.
Weave in tail.
Add your buttons in your preferred positions. The gaps between the ribbing should be enough for fastening and that is why I have not created button holes.
Boho Festival Hoodie
Pattern is written in US terms.
A stylish and warm Bohemian hooded jacket in sizes 12months – Adult XXXLarge.
Crochet along video tutorial available!
Made from bottom to top, adding the sleeves, hood and ribbed edging.
In stock
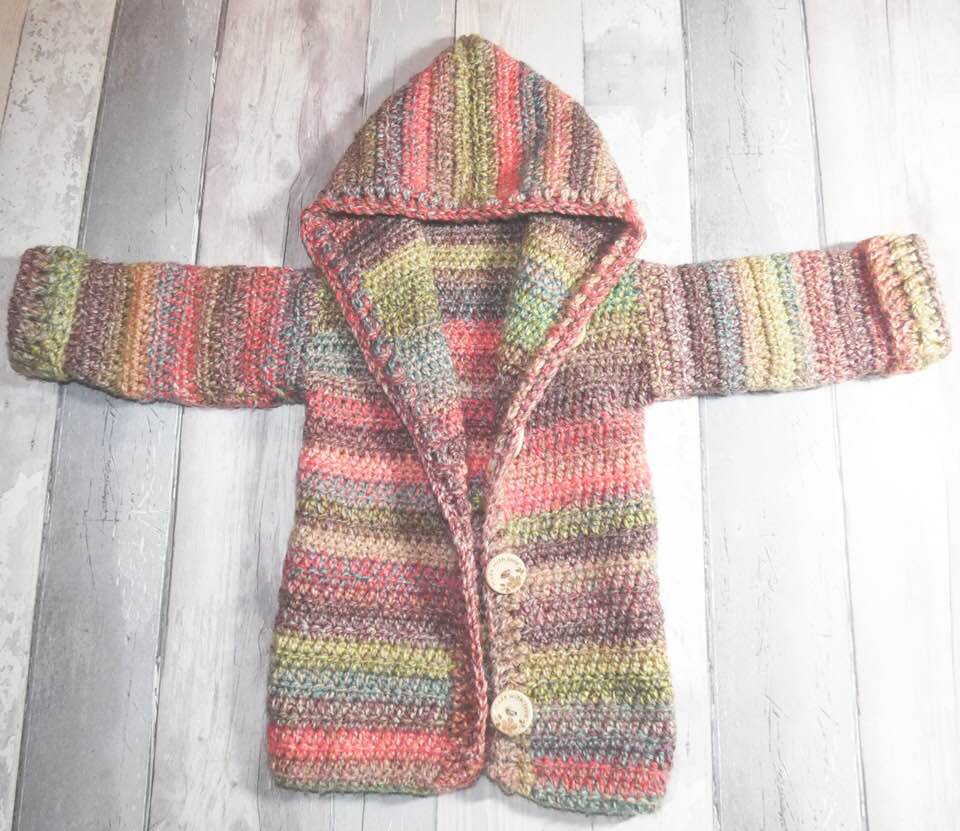
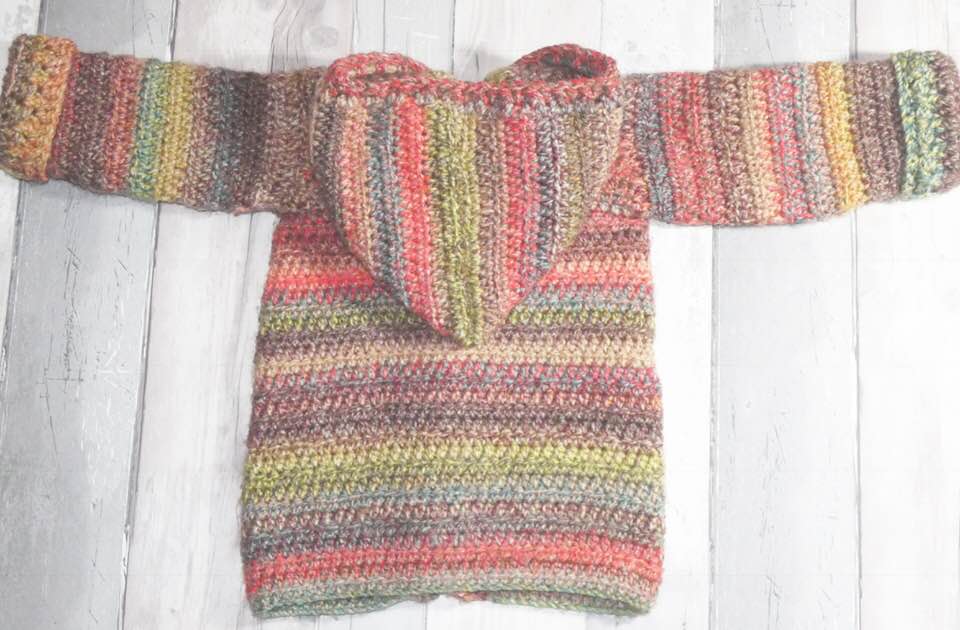
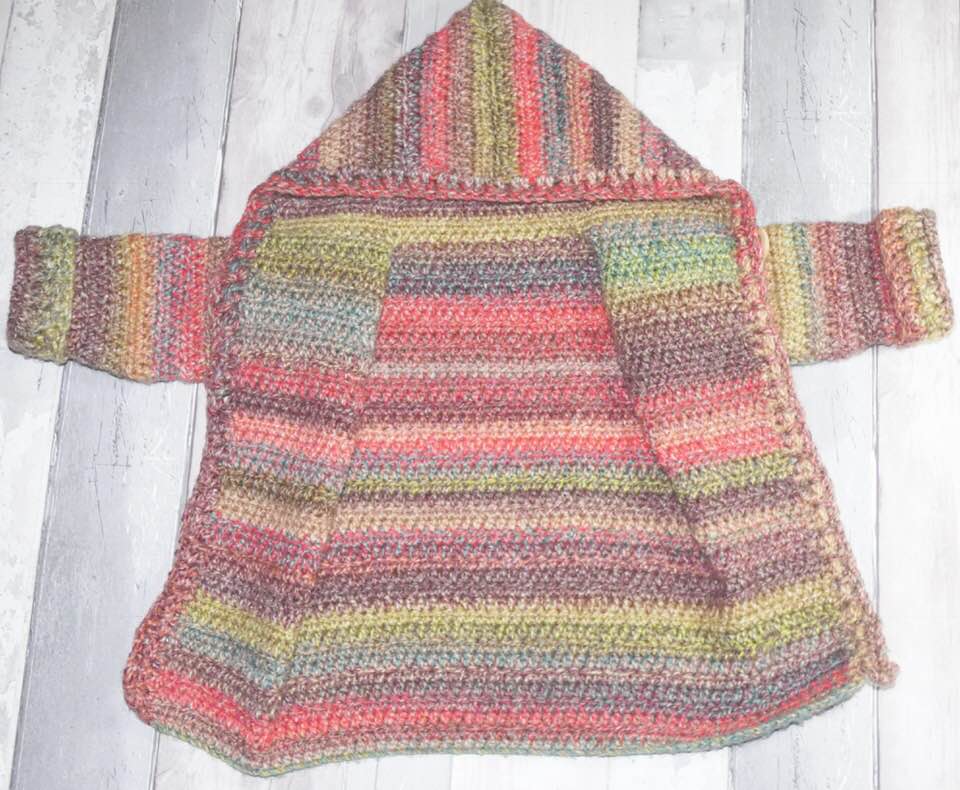
You should now have your soft and snuggly hoodie for that little one in your life! 🙂
If you need to contact me about this pattern please use the contact page @
www.etsy/peanutandplum.com or www.peanutandplum.co.uk
Please share your makes with me using #peanutandplum x
Pinterest/peanutandplum
Instagram/ #peanutandplum
Facebook/peanutandplum
Happy crocheting!
