
Alpine stitch – Easy Crochet stitch
Crochet Stitch Tutorial
Alpine Crochet Stitch Guide
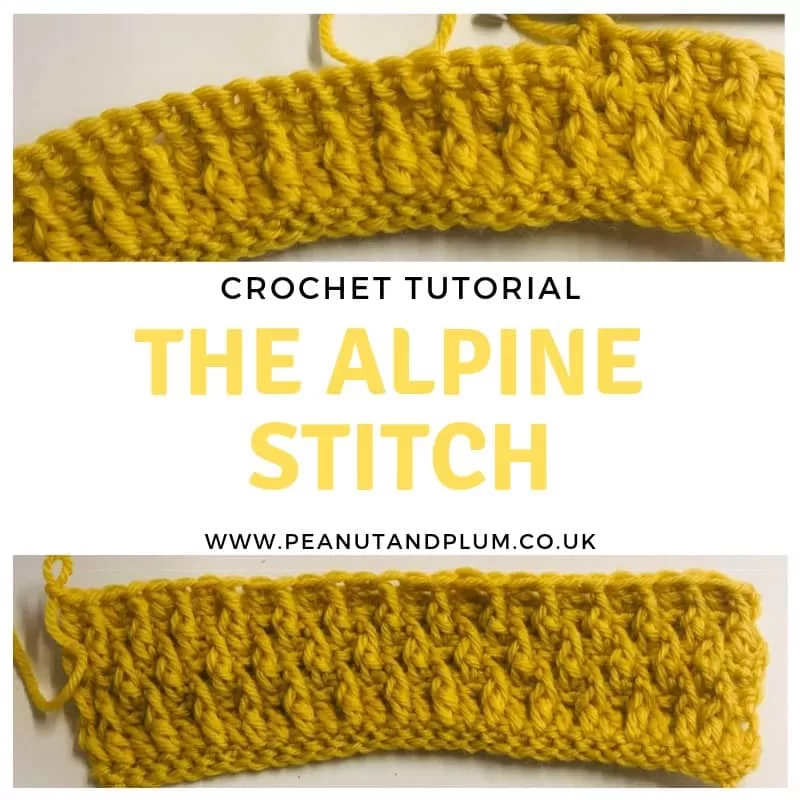
How to Crochet the Alpine Stitch
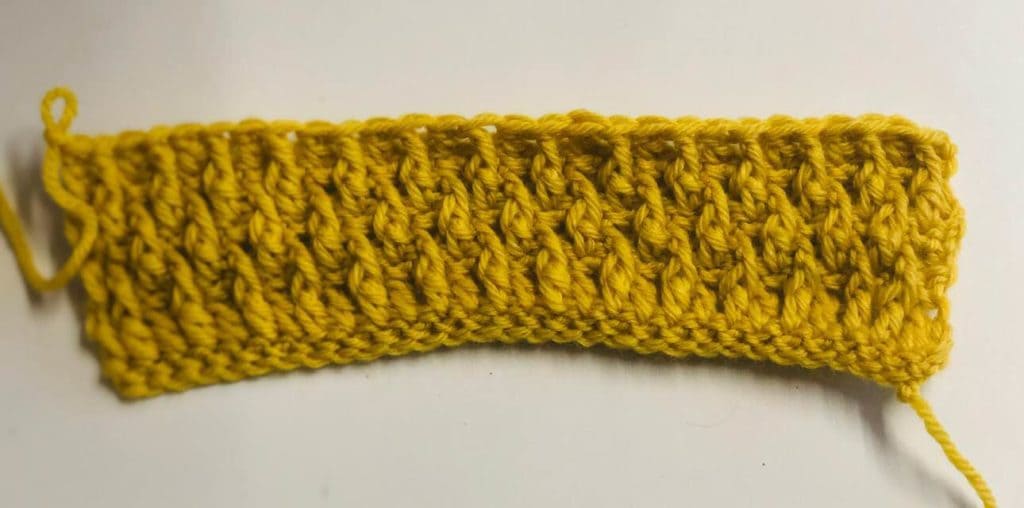
A beautifully textured crochet stitch tutorial showing you how to work the Alpine stitch using simple rows of single crochet, double crochet, and front post double crochet. This stitch creates a raised, bouncy, professional-looking fabric that works beautifully for blankets, beanies, jumpers, scarves, gilets, and cosy accessories.
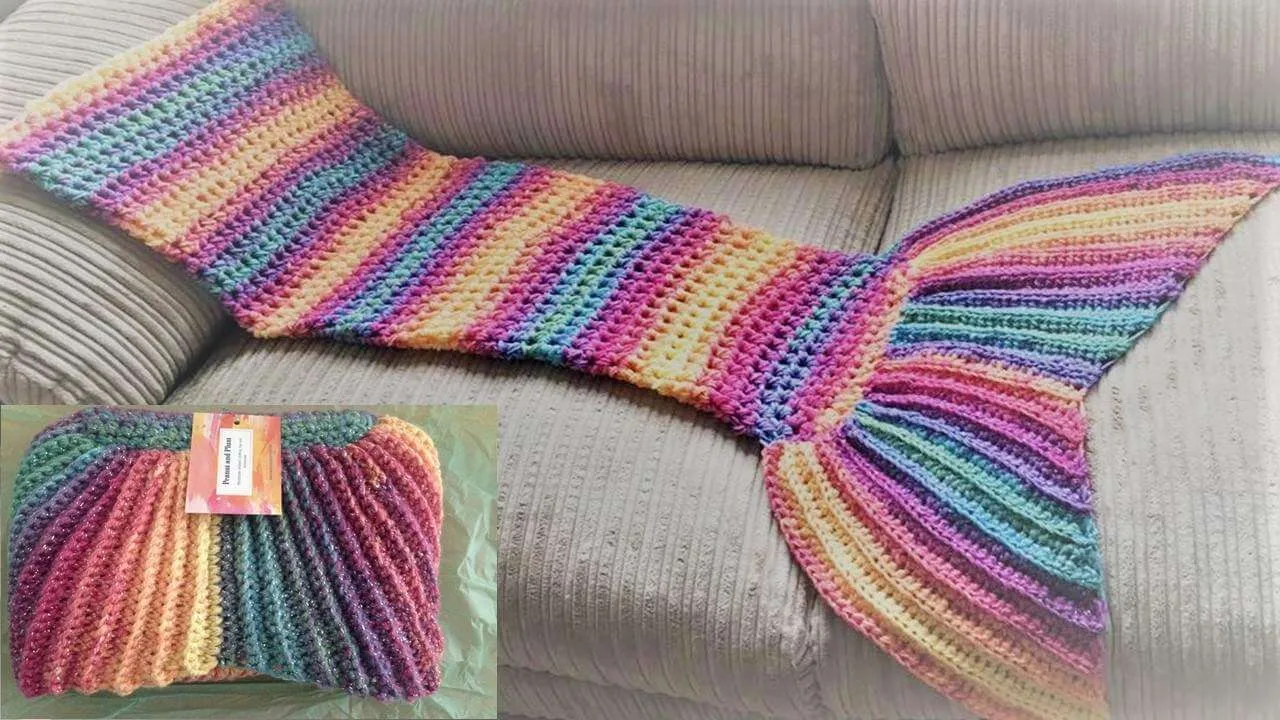
The Alpine stitch is one of those stitches that looks far more complicated than it actually is. It creates a defined raised texture, almost like little ridges of Alpine trees running through your work, giving even simple projects a polished, boutique-style finish.
It has a lovely amount of stretch and bounce, making it useful for both clothing and homeware. In garments, it adds ease and texture. In blankets, it gives a soft, cushioned fabric that still feels light and airy but has enough density to feel cosy.
Quick Stitch Info
Skill level: Easy / Confident Beginner
Best for: Blankets, scarves, beanies, jumpers, gilets and textured accessories
Recommended hook: 5mm–6mm
Main stitches: SC, DC and FPDC
Texture: Raised, bouncy, defined and slightly cushioned
Fabric feel: Soft, stretchy, warm and professional-looking
What’s Included
This tutorial includes a written Alpine stitch pattern, row-by-row instructions, stitch explanations, helpful notes, a video tutorial, yarn and hook guidance, project ideas, and links to Peanut & Plum patterns that use this stitch beautifully.
Why You’ll Love the Alpine Stitch
The Alpine stitch gives crochet a beautifully raised, almost woven texture. It is made by alternating plain rows with front post stitches, which pushes sections of the fabric forward and creates that lovely bumpy effect.
It works especially well when you want a project to look more detailed without using complicated colourwork or advanced shaping. Once you understand where the front post stitches go, the repeat becomes rhythmic and easy to follow.
Tip: the Alpine stitch looks best when your tension is even. If your front post stitches are too tight, the fabric can pull in; if they are too loose, the texture can look uneven.
Key Features
- Creates a raised, bumpy, defined texture
- Uses simple stitches in a clever repeat
- Adds stretch and bounce to crochet fabric
- Works beautifully for both garments and accessories
- Gives projects a polished, professional finish

Bonus PDF Guides Included
When you purchase Peanut & Plum PDF patterns, you’ll also receive helpful bonus guides designed to make your crochet projects easier to follow and more enjoyable.
- Pattern Reading Guide: understand abbreviations, repeats, brackets, sizing and pattern layout.
- Yarn Guide: learn how yarn weight, fibre, stretch, texture and drape affect your finished project.
Tip: textured stitches like Alpine are much easier once you understand stitch placement, so the pattern reading guide is a useful extra before starting a full project.
Yarn, Hook and Fabric Feel
For a clear Alpine stitch texture, I recommend using a 5mm–6mm hook with yarn that matches the hook size. You can use thicker or thinner yarns, but the raised effect is usually most defined with this middle-weight range.
A smooth yarn will show the stitch texture clearly, while a slightly soft or bouncy yarn gives the fabric more squish and movement. The Alpine stitch naturally creates a fabric that feels thicker than plain double crochet, so it is lovely for cosy beanies, blankets, cardigans, sweaters and gilets.
Tip: if you are using the Alpine stitch for clothing, make a swatch first. The texture can pull the fabric in slightly, so checking drape and width before starting is worth the few extra minutes.

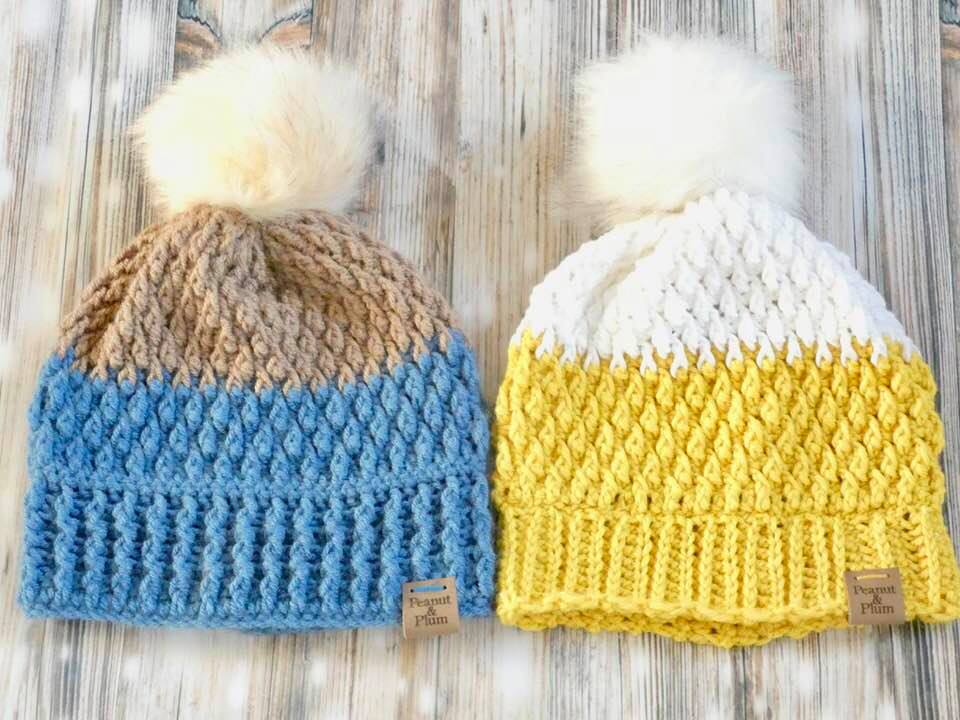
Quick Project Idea: Alpine Beanie
If you want to practise the Alpine stitch on a smaller project, the Azalea Alpine Beanie is a lovely place to start. A beanie gives you enough repetition to learn the stitch properly without committing to a full blanket or garment straight away.
The beanie can be made in two ways depending on your preference, and it is a practical way to test your tension, understand the stitch repeat, and see how the raised texture builds as you work.
Stitches Used in the Alpine Stitch
The Alpine stitch is made with alternating rows of single crochet, double crochet and front post double crochet. If you have mastered double crochet, you are already very close to being able to work this stitch confidently.
- CH: Chain
- SC: Single crochet
- DC: Double crochet
- FPDC: Front post double crochet
How to work single crochet: insert your hook into the stitch, yarn over and pull up a loop, yarn over again and pull through both loops on your hook. Single crochet creates the flat rows that allow the Alpine texture to stand out.
How to work double crochet: yarn over, insert your hook into the stitch, yarn over and pull up a loop, yarn over and pull through two loops, then yarn over and pull through the final two loops. Double crochet gives height and structure to the stitch repeat.
How to work front post double crochet: yarn over, insert your hook from front to back to front around the post of the stitch below, then complete a double crochet as normal. This pulls the stitch forward and creates the raised Alpine texture.
Tip: front post stitches should sit around the post of the stitch below, not into the top loops. This is what makes the texture pop forward.
The Alpine Crochet Stitch Pattern
Notes before you start: always begin with a row of single crochet. Chain 1 and chain 2 are used to start rows in this tutorial.
Row 1
Work 1 single crochet in each stitch across. Chain 2 and turn.
Row 2
Work 1 double crochet in each stitch across. Chain 1 and turn.
Row 3
Work 1 single crochet in each stitch across. Chain 2 and turn.
Row 4
*Work 1 front post double crochet in the second stitch, then 1 double crochet in the next stitch. Repeat from * to the end of the row. Chain 1 and turn.
Note: always end the row with a regular double crochet, not a front post double crochet.
Row 5
Single crochet across. Chain 1 and turn.
Row 6
*Work 1 double crochet in the second stitch, then 1 front post double crochet in the next stitch. Make sure that where you worked a regular double crochet on the previous textured row, you now work a front post double crochet; where you previously worked a front post double crochet, you now work a regular double crochet.
You are aiming to pop the double crochet from the previous row forward. If the stitch is already raised, work a regular double crochet in the single crochet space, then work the next stitch as a front post double crochet.
Repeat from * to the end of the row.
Repeat Rows 5 and 6 until your project reaches the desired length.
Common Mistakes to Avoid
- Working the front post stitch into the top loops instead of around the post
- Forgetting the single crochet rows between textured rows
- Ending a textured row with a front post stitch instead of a regular double crochet
- Pulling front post stitches too tightly and narrowing the fabric
- Losing the staggered placement that creates the Alpine effect
Skill builder: the Alpine stitch helps you practise front post stitches, row repeats, texture placement, tension control and reading your crochet fabric.
Watch the Alpine Stitch Video Tutorial
If you prefer to see the stitch in action, follow along with the video tutorial below.
Patterns to Try with the Alpine Stitch
Once you have practised the Alpine stitch, there are so many projects you can use it for. It gives garments and accessories a lovely professional texture without making the pattern feel too complicated.
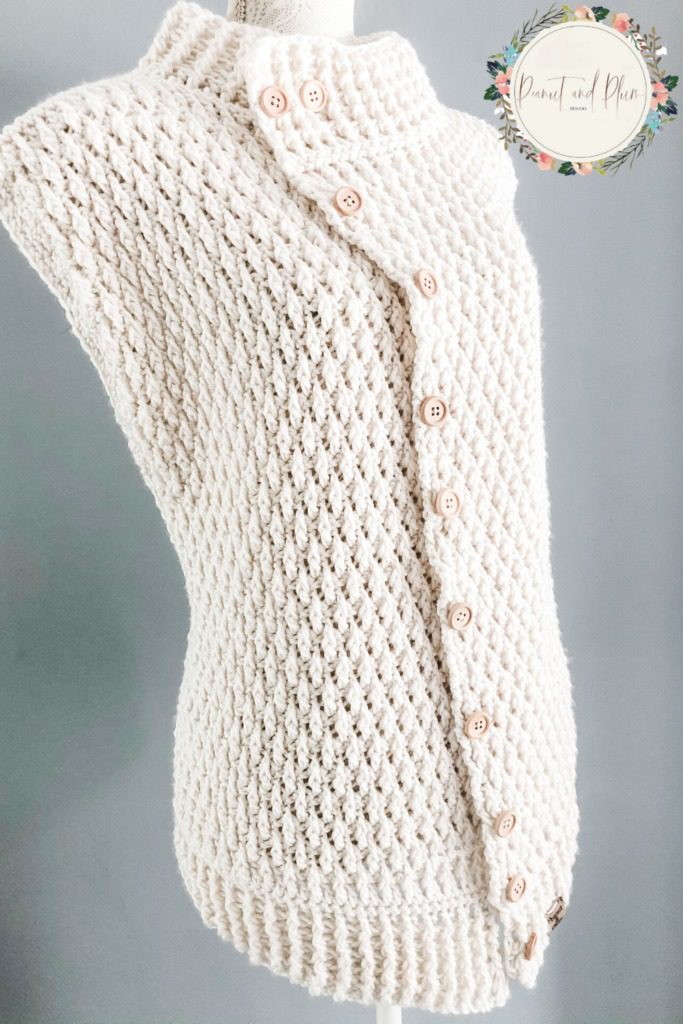
The Drops of Jupiter gilet uses textured crochet to create a defined, wearable style. It is simple to make and designed in sizes XSmall to XXXXLarge.
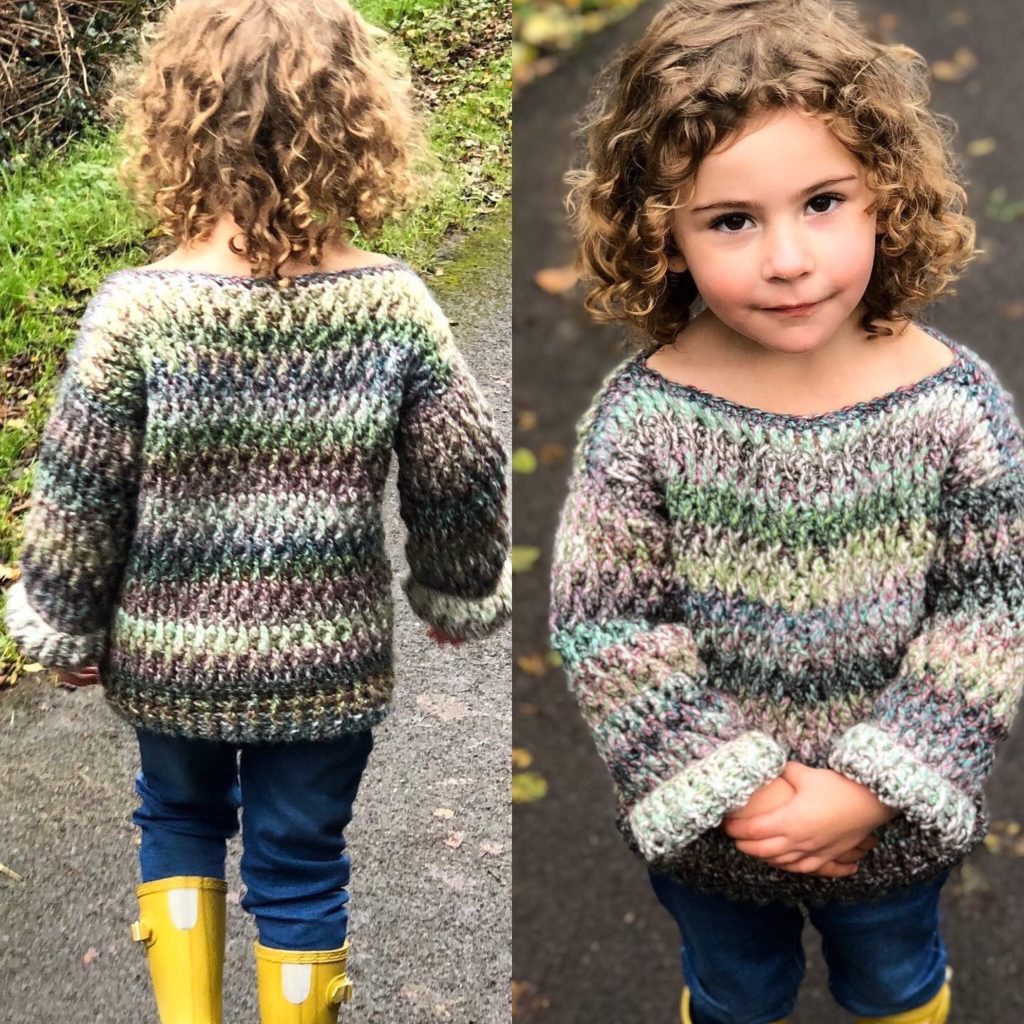
The rustic sweater is another lovely project where textured stitches add charm, warmth and definition. It works beautifully in marble and muted yarn colours for that cosy rustic finish.
Need extra help?
Stuck on the Alpine stitch?
If you get stuck with front post stitches, row placement, tension, stitch counting, or understanding how the texture builds, you can book a 30 minute 1:1 crochet help session and work through it properly.
New to Crochet Patterns?
If crochet patterns feel confusing, my complete guide to reading crochet patterns breaks down abbreviations, repeats, sizing and instructions in a simple, beginner-friendly way.
Buy the Pattern
Ready to practise the Alpine stitch in a finished project? The Azalea Alpine Beanie is a lovely quick make with a clean textured finish, perfect for building confidence with this stitch.
Prices may be slightly higher on other platforms due to selling fees.
Bundle and Save
Building your crochet pattern library? Save when you buy more than one pattern.
Save 20% on 3 items with code MBUY20
Save 10% on 2 items with code MBUY10
Want More Crochet Stitch and Pattern Ideas?
Try another textured project or build confidence with my pattern reading guide.

Happy Crocheting!
I would love to see your makes — please share with me using #PeanutandPlum.