
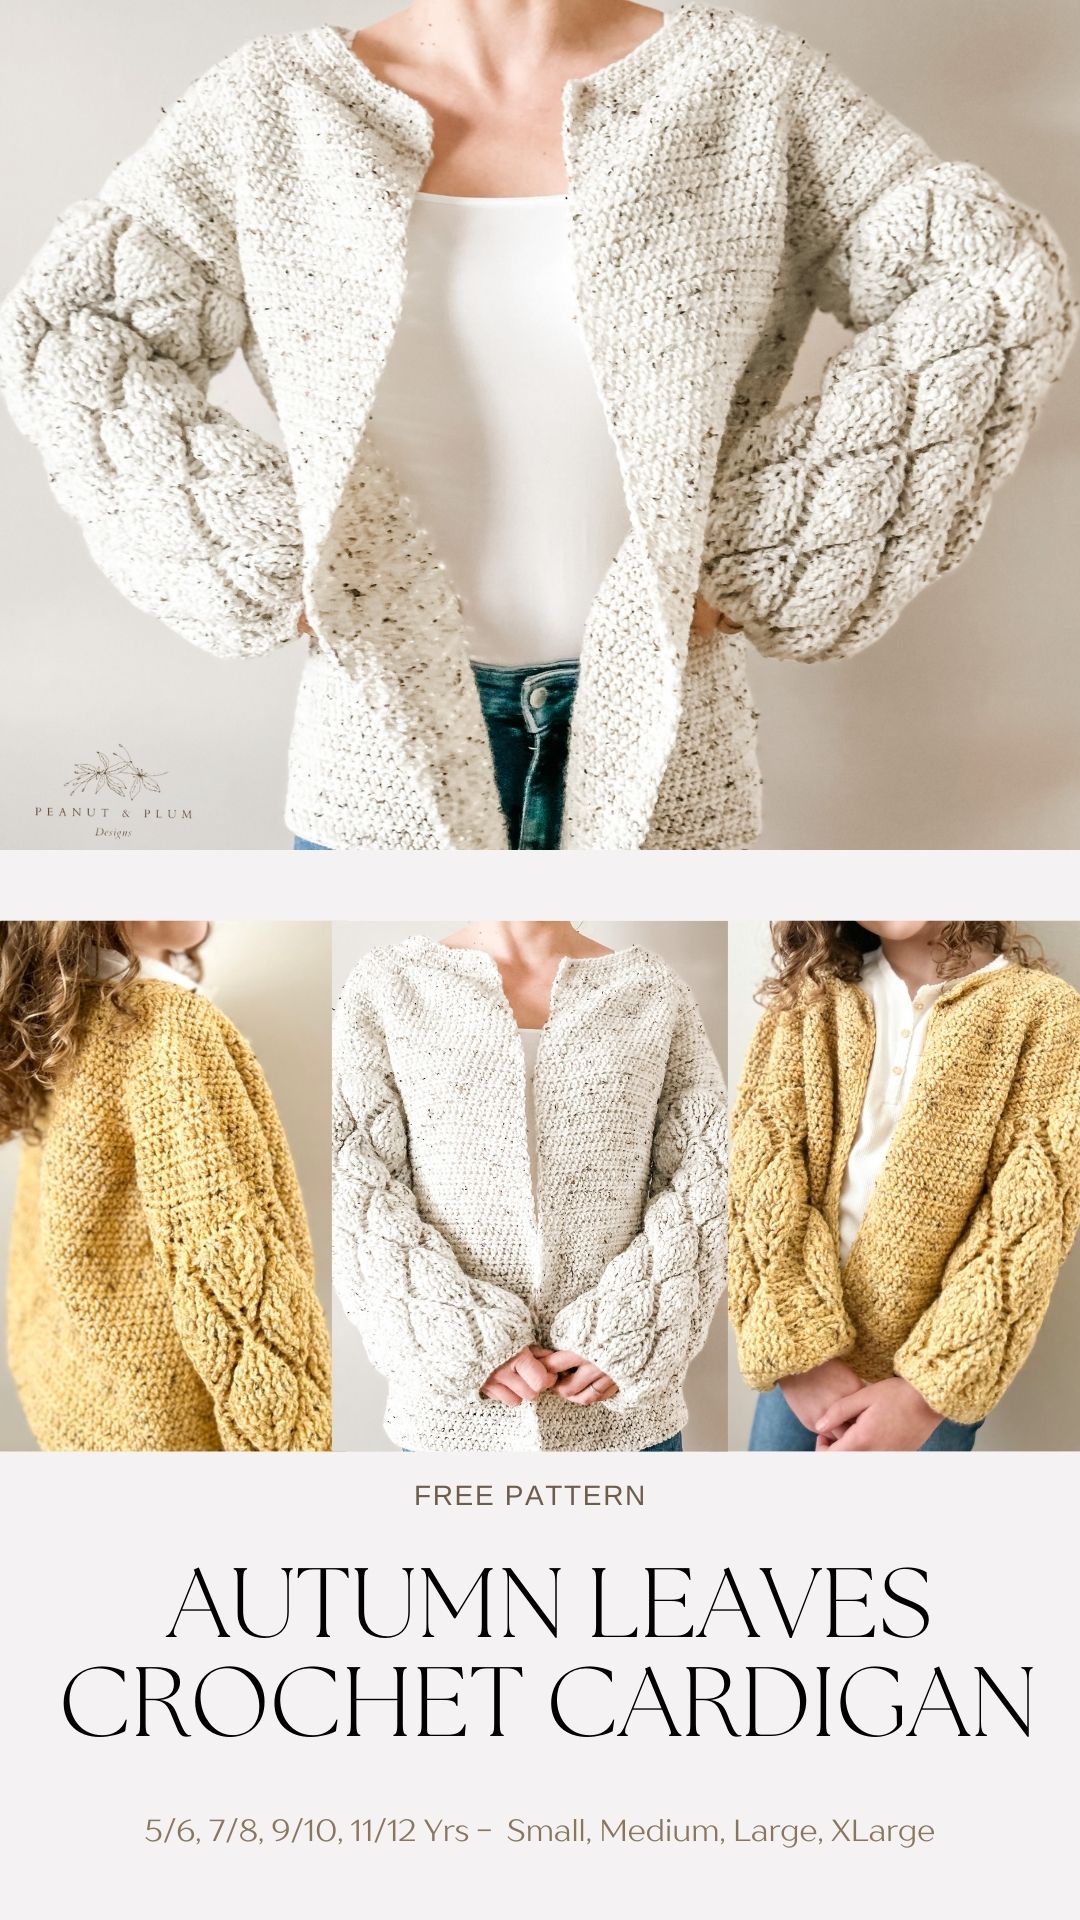
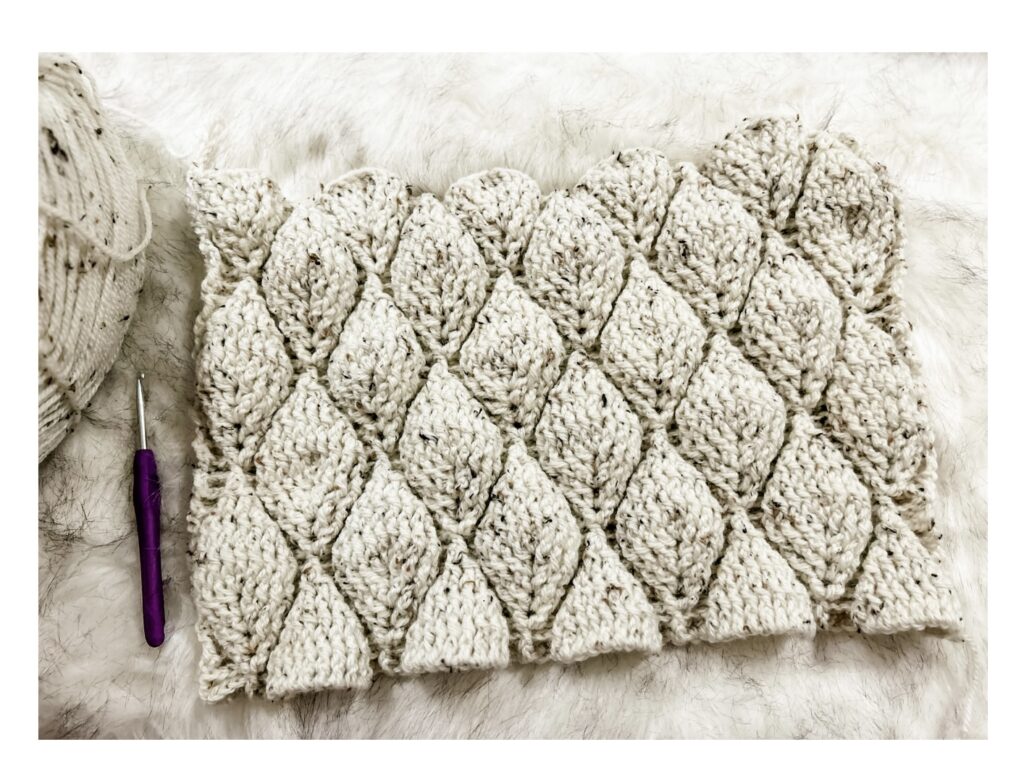
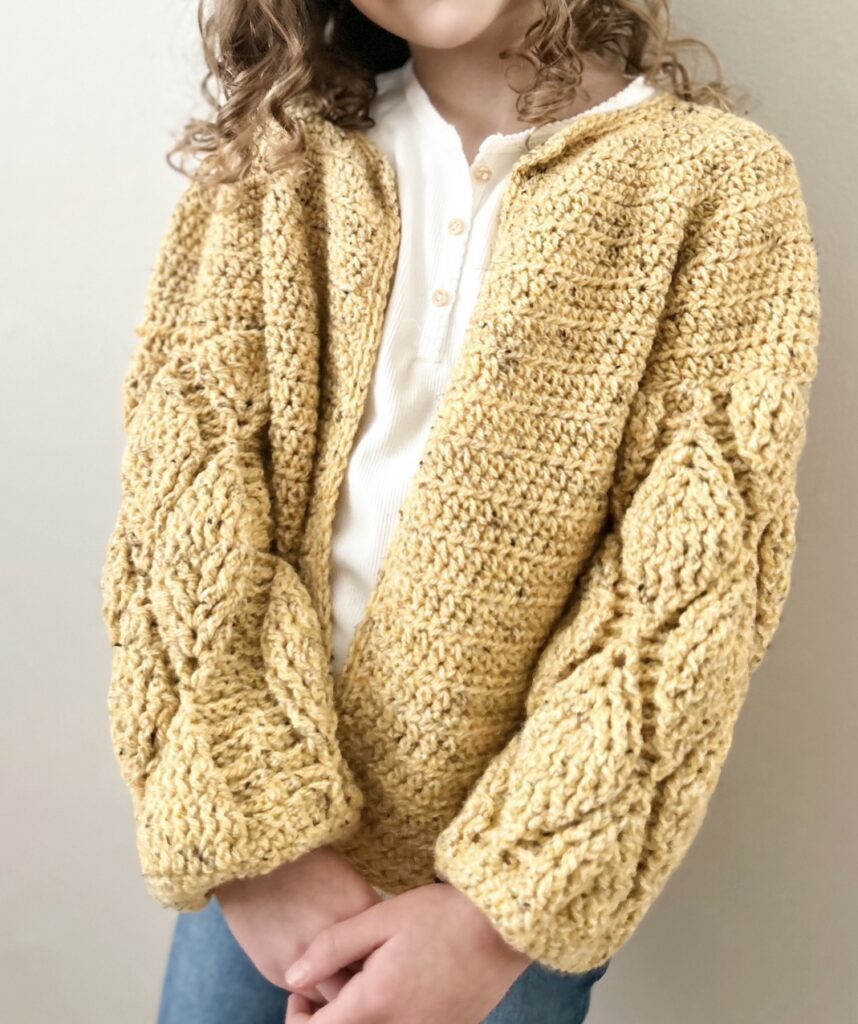
Autumn leaves crochet cardigan
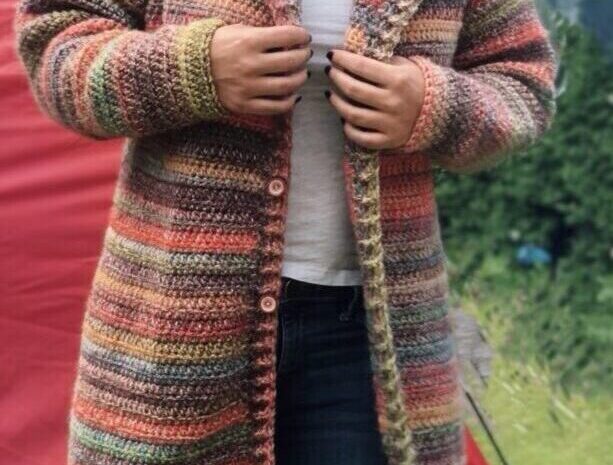
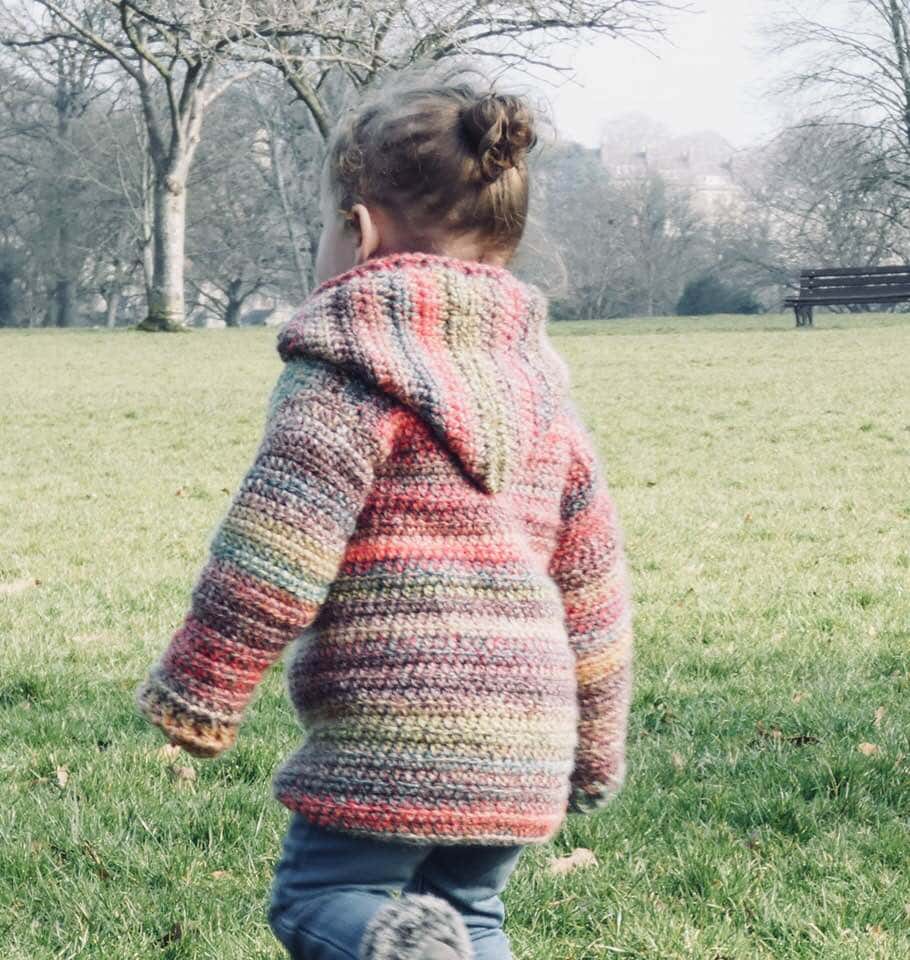
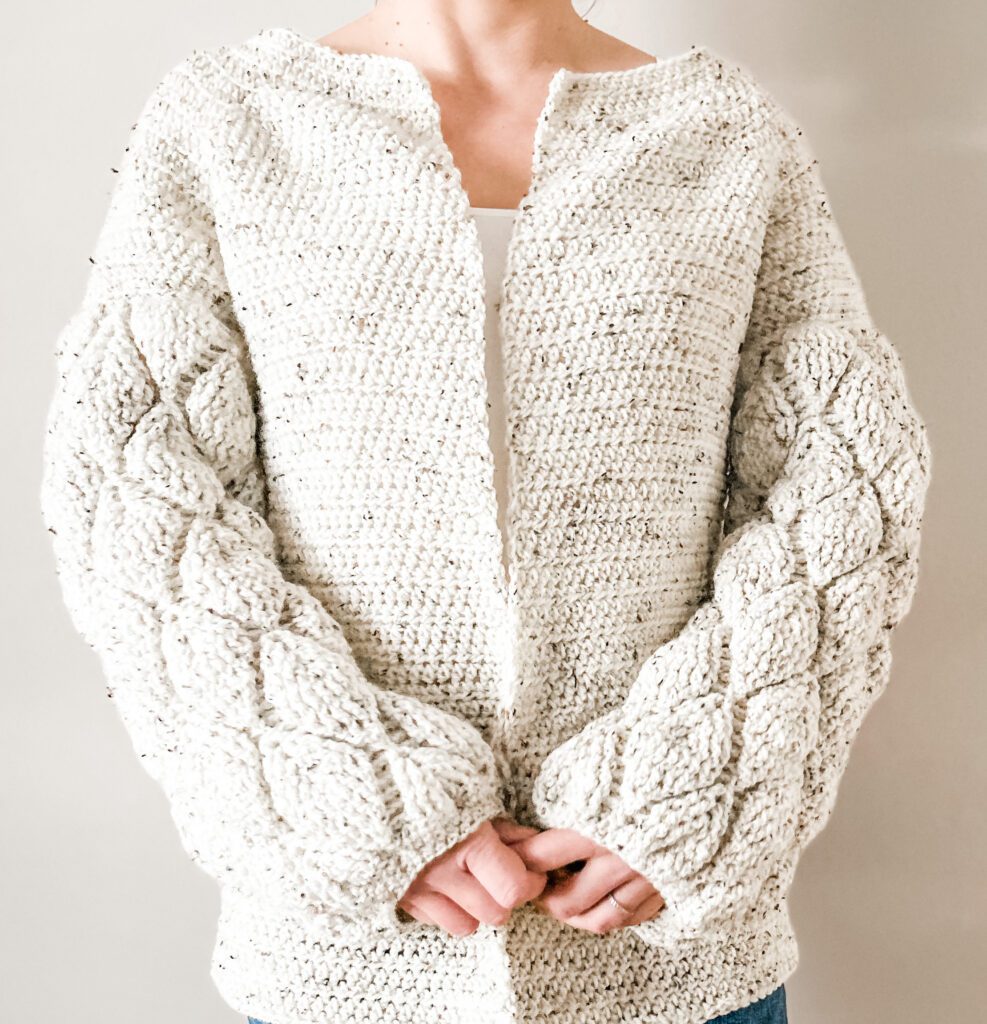
The Autumn leaves crochet cardigan is oh-so-soft and oh-so-stylish. In a comfortable and relaxed fit, this crochet cardigan with raised leave design sleeves, looks great styled over a blouse with jeans and boots. Free pattern available in children and adult sizes!
- Soft and comfortable
- Relaxed fit
- Children and adult sizes
- Pretty leaves design
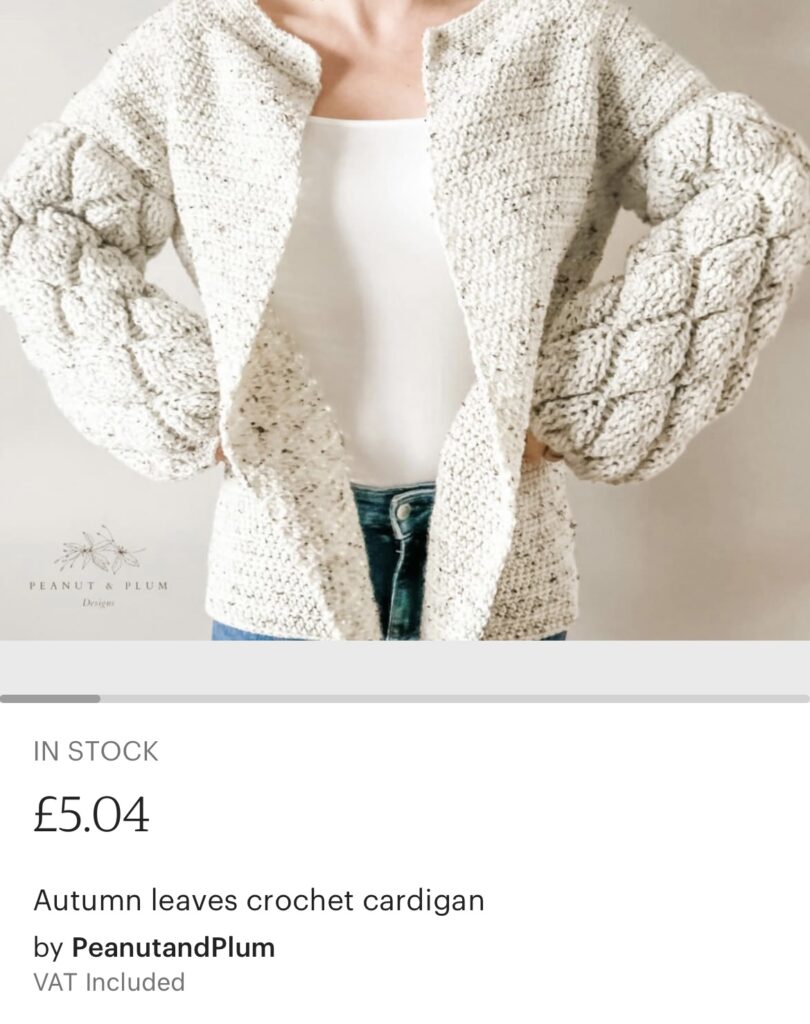
Purchase an inexpensive - Ad free pdf download from my Peanut and Plum store or Etsy!
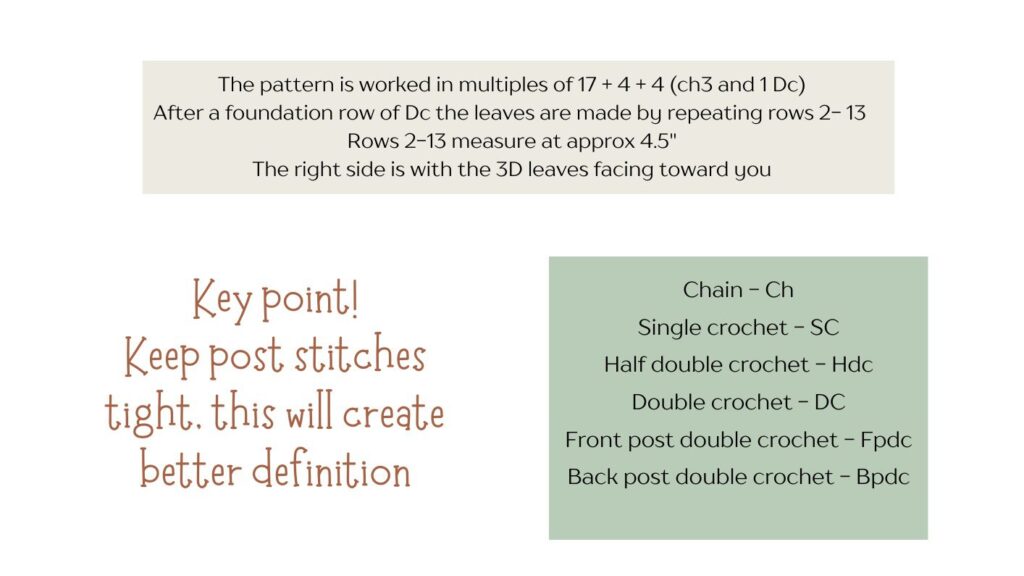
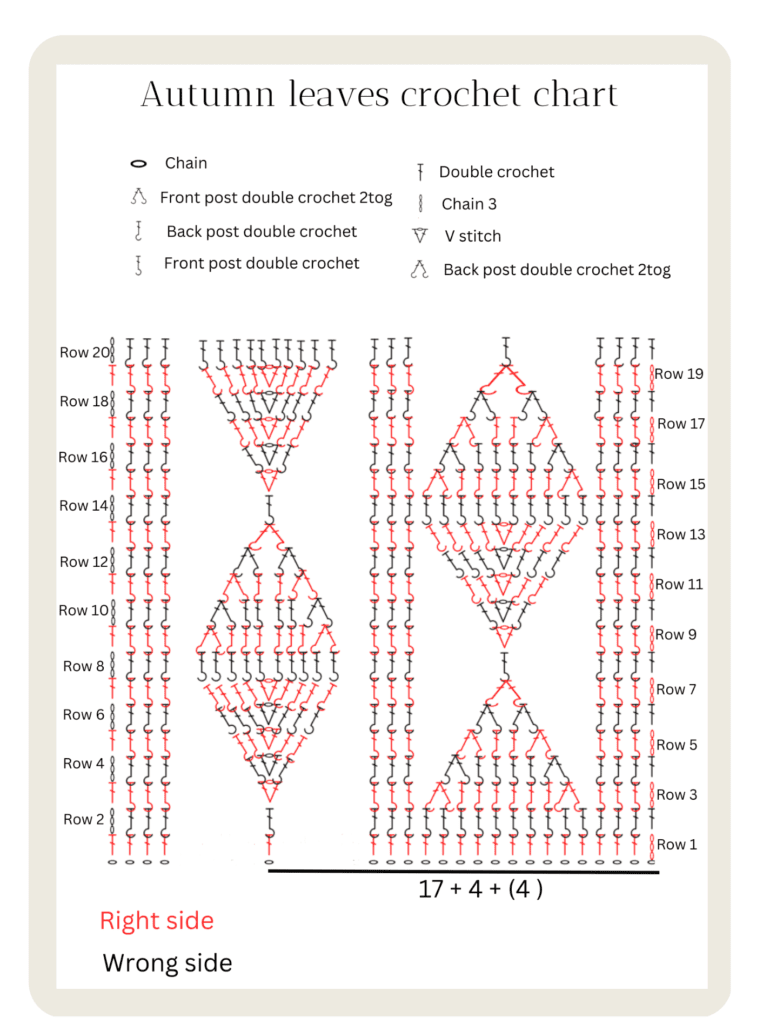
Keep the leaves stitch diagram handy throughout and highlight the size you are working on.
This can help following the pattern a lot easier!
Pattern is written raglan style top down.
Sleeves are worked separately and will be attached to the body.
The cardigan is true to size with approximately 3" stretch for comfort.
Cardigan size in inches " (measured at the chest)
- 5/6Yrs - 26" 7/8 Yrs - 28.5" 9/10 Yrs - 29.5" 11/12Yrs - 31"
- Small - 35" Medium 38" Large 43.5" XLarge 48"
Autumn leaves crochet cardigan
Starting with the body section
5/6yrs, 7/8yrs, 9/10yrs, 11/12yrs, (Small, Medium, Large, XLarge)
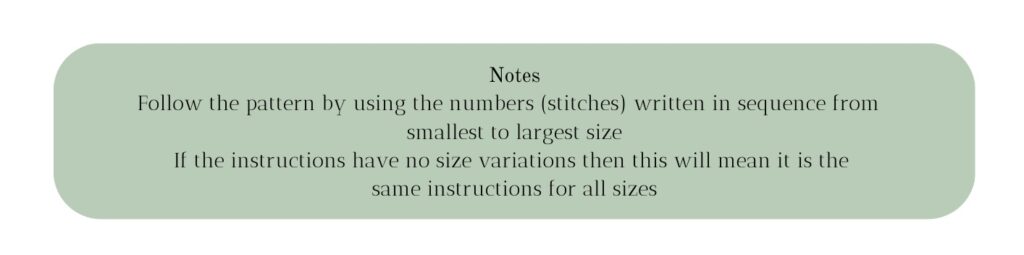
Here is the sequence the sizes are written in, you may want to highlight to make it easier for you to follow your size.
Using your 6mm/ J Hook Chain 57' 61, 61, 69, 77, 85, 101, 105
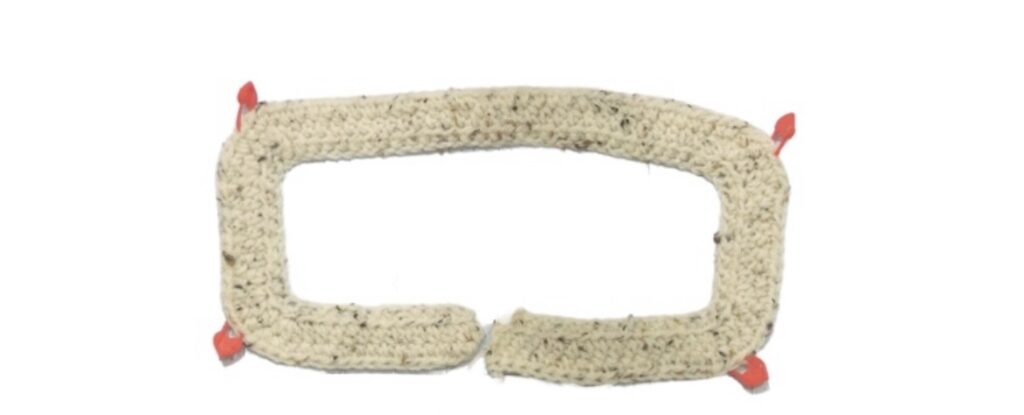
We will now do our set up row, placing 4 markers along our foundation chain to create sections for our lapels, sleeves and back section.
Hdc in the second Ch from your hook (turning Ch1 does not count as a Hdc).
Hdc across 9, 10, 10, 11 (13, 15, 18, 20) in total -
Place a marker in the last stitch worked
Hdc across 8, 8, 8, 10, (10, 10, 12, 10) in total -
Place a marker in last stitch worked
Hdc across 22, 24, 24, 26, (30, 34, 40, 44) -
Place a marker in last stitch worked
Hdc across 8, 8, 8, 10, (10, 10, 12, 10)
Place a marker in last stitch worked
Hdc across 9, 10, 10, 11, (13, 15, 18, 20) to the end of your row.
ch. 1, turn
Row 1: (Follow these instructions for all sizes)
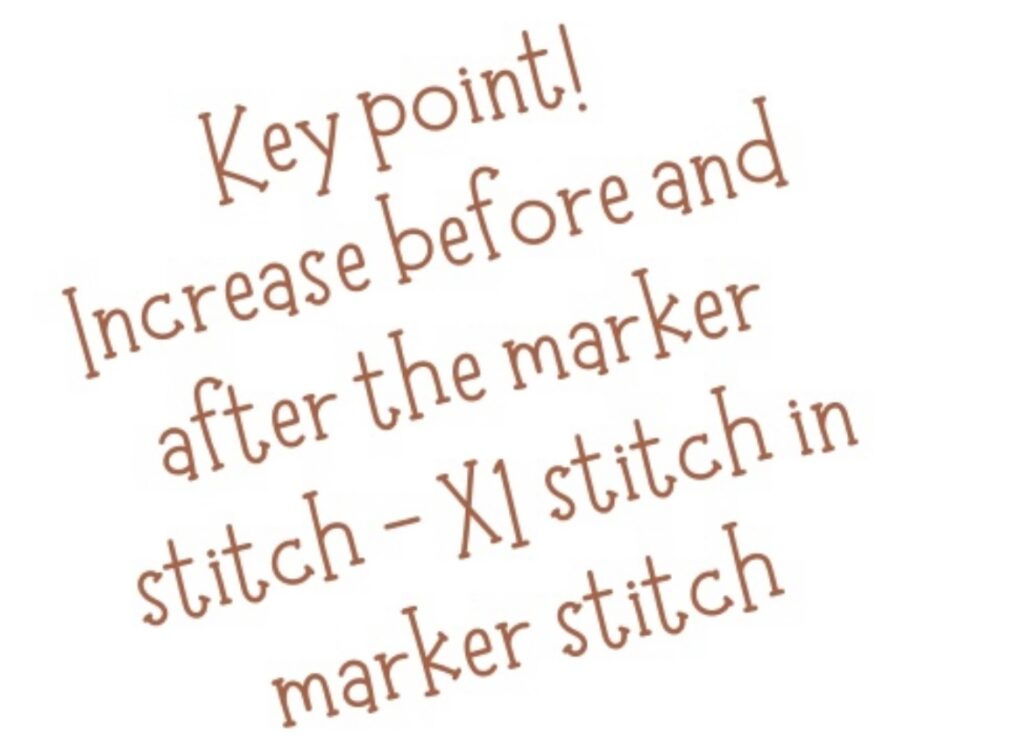
**Hdc across to the stitch before your marker stitch, Hdc 3 times into this stitch, the next stitch is your marker stitch, place 1 Hdc in your marker stitch - move your marker up as you go.
Hdc 3 times in the stitch after your marker stitch.**
Repeat from ** 3 more times.
Hdc to the end of the row
Ch 1, turn
Row 2: (Follow these instructions for all sizes)
**Hdc across to the stitch before your marker stitch, Hdc 2 times into this stitch, the next stitch is your marker stitch, place 1 Hdc in your marker stitch - move your marker up as you go.
Hdc 2 times in the stitch after your marker stitch.**
Repeat from ** 3 more times.
Hdc to the end of the row
Ch 1, turn
Repeat row 2 -'11, 12, 12, 13, 14, 15, 18, 22 more times
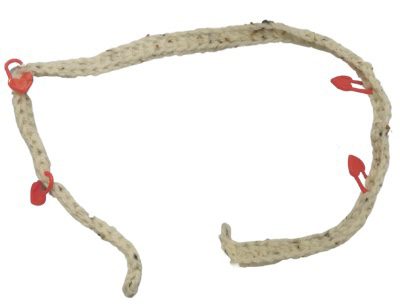
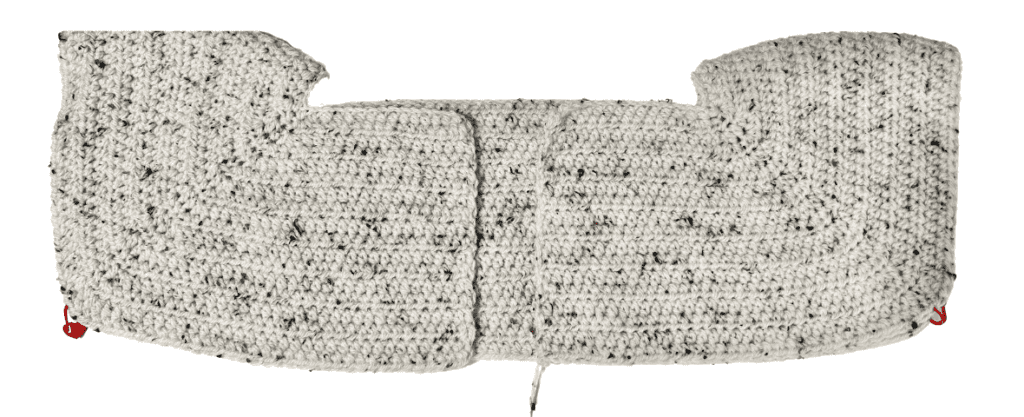
Sleeve seperation
Hdc across to your first marker,
Place 1 Hdc in your marker stitch, remove marker.
Ch 1, skip all of the next 35, 37, 37, 41 (43, 45, 53,, 59) stitches
Hdc into your next marker stitch, remove marker
Hdc in each stitch across to your next marker
Place 1 Hdc in your marker stitch, remove marker.
Ch 1, skip all of the next 35, 37, 37, 41 (43, 45, 53,, 59) stitches
Hdc into your next marker stitch, remove marker
Hdc in each stitch to the end
Ch 1, turn
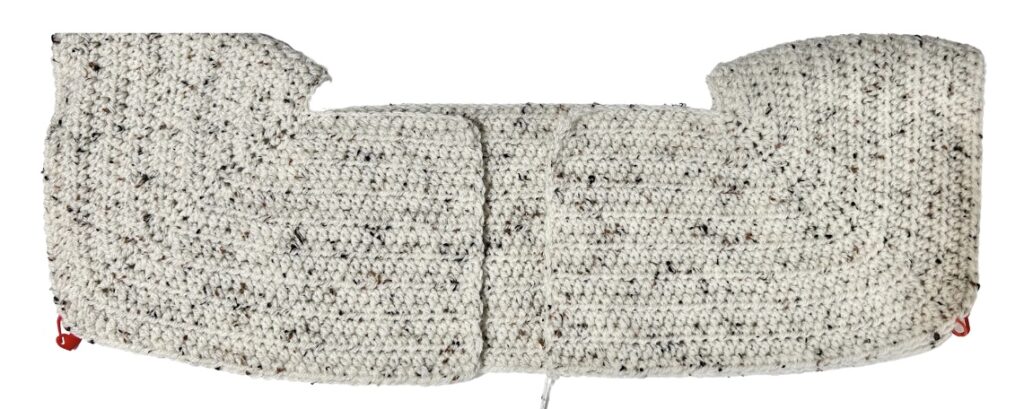

Body depth
Hdc across the bottom edge of the body section, place 1 Hdc in the Ch 1 space
(the underarm of sleeve)
Repeat rows of Hdc for a total of 24, 28, 32, 34, (38, 40, 42, 44) rows
Do not fasten off!
Add or subtract rows of Hdc to suit your preferred length of cardigan.
Autumn leaves crochet cardigan - Sleeves
Using your 5mm/J hook
Ch 59, 59, 76, 76 (93, 93, 110, 110)
Row 1: Double crochet in 3rd Ch from hook (ch3 counts as a Dc throughout), Dc in each stitch across
Ch3, turn
56, 56, 73,73 (90,90, 107,107) stitches
Your stitch count should stay the same for each row .
Row 2: Bpdc in next 3 stitches. Fpdc in the next 10 stitches, Bpdc in next 3 stitches, Fpdc in next stitch, Bpdc in next 3 stitches, ** Fpdc in the next 10 stitches, Bpdc in next 3 stitches, Fpdc in next stitch, Bpdc in next 3 stitches**
repeat from ** across
Dc in last stitch,
Ch3 turn.
Row 3: Fpdc in next 3 stitches, (Dc,Ch1,Dc) in next stitch, Fpdc in next 3 stitches, Bpdc2tog, Bpdc in next 6 stitches, Bpdc2tog, Fpdc in next 3 stitches, **(Dc,Ch1,Dc) in next stitch, Fpdc in next 3 stitches, Bpdc2tog, Bpdc in next 6 stitches, Bpdc2tog, Fpdc in next 3 stitches,**
Repeat from ** across
Dc in top of ch3,
Ch3 turn.
Row 4: Bpdc in next 3 stitches, Fpdc2tog, Fpdc in next 4 stitches, Fpdc2tog, Bpdc in next 3 stitches, Fpdc in next stitch, (Dc,Ch1,Dc) in chain 1 space, Fpdc in next stitch, Bpdc in next 3 stitches
**Fpdc2tog, Fpdc in next 4 stitches, Fpdc2tog, Bpdc in next 3 stitches, Fpdc in next stitch, (Dc,Ch1,Dc) in chain 1 space, Fpdc in next stitch, Bpdc in next 3 stitches**
Repeat from ** across
Dc in top of ch3,
Ch3 turn
Row 5: Fpdc in next 3 stitches, Bpdc in next 2 stitches, (DC, Ch1, DC) in Ch1 space, Bpdc in next 2 stitches, Fpdc in next 3 stitches, Bpdc2tog, Bpdc in next 2 stitches, Bpdc2tog,
**Bpdc in next 2 stitches, (DC, Ch1, DC) in Ch1 space, Bpdc in next 2 stitches, Fpdc in next 3 stitches, Bpdc2tog, Bpdc in next 2 stitches, Bpdc2tog, Fpdc in next 3 stitches**
Repeat from ** across
Dc in top of ch3,
Ch3 turn.

Row 9: Fpdc in next 3 stitches, Bpdc2tog, Bpdc in next 6 stitches, Bpdc2tog, Fpdc in next 3 stitches, (Dc,Ch1,Dc) in next stitch, Fpdc in next 3 stitches, ** Bpdc2tog, Bpdc in next 6 stitches, Bpdc2tog, Fpdc in next 3 stitches, (Dc,Ch1,Dc) in next stitch, Fpdc in next 3 stitches, **
Repeat from ** across
Dc in top of ch3,
Ch3, turn
Row 10: Bpdc in next 3 stitches, Fpdc in next stitch, (Dc,Ch1,Dc) in chain 1 space, Fpdc in next stitch, Bpdc in next 3 stitches, Fpdc2tog, Fpdc in next 4 stitches, Fpdc2tog, **Bpdc in next 3 stitches, Fpdc in next stitch, (Dc,Ch1,Dc) in chain 1 space, Fpdc in next stitch, Bpdc in next 3 stitches, Fpdc2tog, Fpdc in next 4 stitches, Fpdc2tog, Bpdc in next 3 stitches**
Repeat from ** across
Dc in top of ch3,
Ch3, turn
Row 11: Fpdc in next 3 stitches, Bpdc2tog, Bpdc in next 2 stitches, Bpdc2tog, Fpdc in next 3 stitches, Bpdc in next 2 stitches, (DC, Ch1, DC) in Ch1 space, Fpdc in next 3 stitches **Bpdc2tog, Bpdc in next 2 stitches, Bpdc2tog, Fpdc in next 3 stitches, Bpdc in next 2 stitches, (DC, Ch1, DC) in Ch1 space, Fpdc in next 3 stitches **
Repeat from ** across
Dc in top of ch3,
Ch3, turn
Row 12: Bpdc in next 3 stitches, Fpdc2tog, Fpdc2tog, Bpdc in next 3 stitches, Fpdc in next 3 stitches, (DC,Ch1, DC) in Ch1 space, Fpdc in next 3 stitches, Bpdc in next 3 stitches **Fpdc2tog, Fpdc2tog, Bpdc in next 3 stitches, Fpdc in next 3 stitches, (DC,Ch1, DC) in Ch1 space, Fpdc in next 3 stitches, Bpdc in next 3 stitches**
Repeat from ** across
Dc in top of ch3,
Ch3, turn
Row 13: Fpdc in the next 3 stitches, Bpdc in the next 4 stitches, (DC, Ch1, DC) in Ch1 space, Bpdc in the next 4 stitches, Fpdc in next 3 stitches, **Bpdc in the next 4 stitches, (DC, Ch1, DC) in Ch1 space, Bpdc in the next 4 stitches, Fpdc in next 3 stitches**
Repeat from ** across,
DC in the top of Ch3,
Ch3, turn
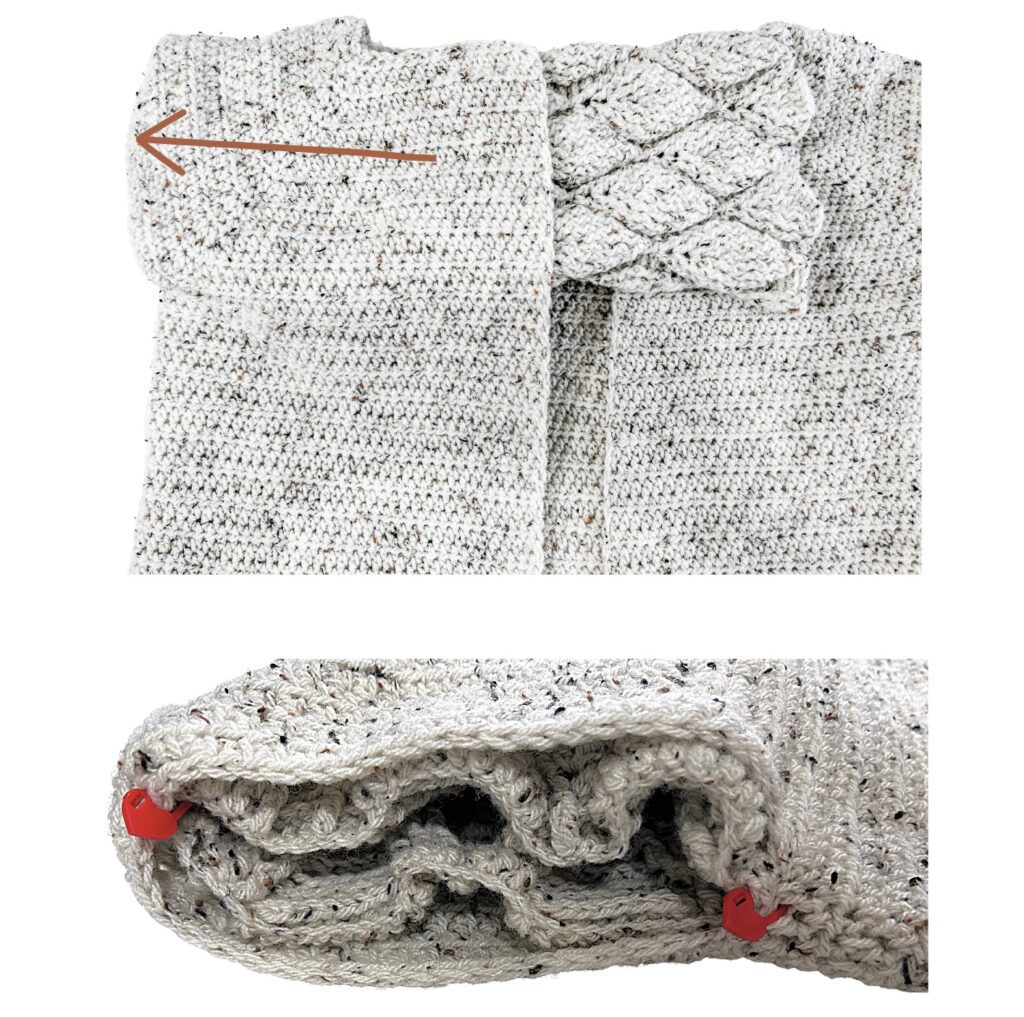
Sleeve construction
Fold your sleeves right sides together, joining your long edges at the side.
Seam along the edge behind your Ch3/DC stitches.
This will create a strong seam that will not be visible under the arm.
Secure your stitches tightly at the beginning and end of your seam.
Place the under arm end of your sleeve through your sleeve space, match up the end of the sleeve to the sleeve separation space at the side of body.
Match up your seems and secure with a marker.
The sleeve is much wider than the sleeve opening, to secure the sleeve you will need to gather it slightly with each stitch - Sew 2 X sleeve stitchs to 1 X sleeve space stitch.
Make sure to sew it tight and secure with a knot at the seam.
Weave in your ends and repeat for opposite sleeve.


Sleeve cuff
For all sizes
Turn your work wrong side out.
With your 5mm hook Join in the seam stitch at the sleeves cuff
Row 1: Sc into the same stitch. Sc into the next stitch, Sc2tog, **Sc in the next 2 stitches, Sc2tog**
Repeat from ** around, Sc into the first stitch of the round - Place marker here
Row 2: Sc in next 2 stitches, Sc2tog, **Sc in next 3 stitches, Sc2tog** repeat from ** around
Sc into first stitch of the round - Move marker up for each round
Repeat rows 2 & 3 one more time
Row 5: Sc in each stitch around, fasten off and weave in your end
Repeat for second sleeve
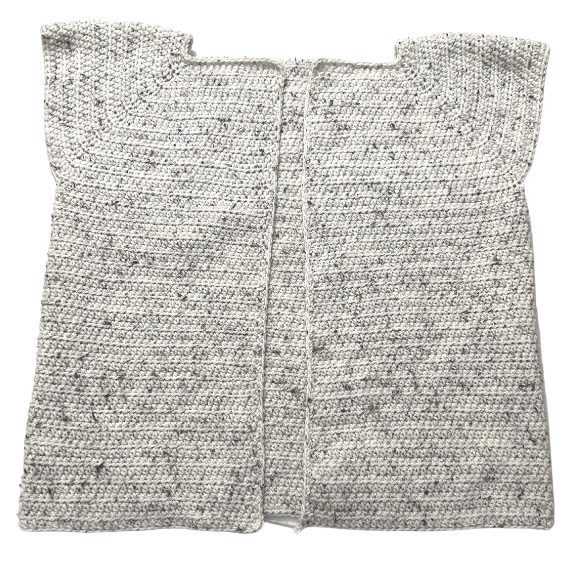
Collar
For all sizes
This part is optional!
The cardigan has an elegant square neck opening that looks lovely as a shrug type cardigan, just draping over the shoulders.
You can add a few rows to the height of the neckline to make a collar.
join your 6mm hook in the first stitch of the foundation row.
Hdc in the same stitch.
Row 1 - 6: Hdc across, Ch1, turn
The Autumn leaves crochet cardigan is complete!
I hope you have enjoyed this pattern, The leaves stitch design can be used for lots of other projects too. You can purchase the inexpensive ad free pdf download and keep the diagram handy for inspiration for your next project!
Purchase on Etsy